Voting

Friday, December 30, 2011

A christmas pig

Christmas is over and the company is gone, the house is clean and now I'm lonely! 
My blog needs attention and I thought I would sit down today and give it some.  
I had many pictures on my phone to show you but there was a phone problem this week and I lost them ALL!  
I would like to thank my dear sister for saving all she could, but most of all for saving my sanity when it came to working my phone.

So this is what you get,
a picture of Delaney and her friend feeding a pig for Ag Science class.


Happy New Year to you all!

Saturday, December 17, 2011

Christmas goodies

I've been doing a lot of Christmas baking these past few days including fudge.  

I found this cute treat idea on Eighteen25 last year and was bound and determined to make them this Christmas, here they are.
  
I used the Fudge recipe on the jar of Marshmallow Cream or you can use the recipe from Eighteen25 which is amazing!


 Boil butter, sugar and milk.


 Add marshmallow cream, chocolate chips, nuts and vanilla.


 Mix it all together till your hand hurts and your pot looks ... like this!


 Scoop it into your container of choice, I went here to get my my pie tins with lids.


Print and cut out the cute labels.  
Hand them to your friends and watch them say ooh and aah!


Then I made Hot Chocolate on a Stick from Whipperberry 
that I will hand out with my Christmas cookies.


Thursday, December 15, 2011

My Christmas wish list

Just a few little things,


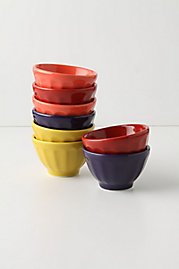
I like these little darlings to put my jewelry in.


I always want more of these, especially the green and gray at the moment.


This...would be a big surprise if I found it wrapped under my tree.


And, I've had a wild hair of late, I would love my very own air compressor 
so I can say goodbye to spray paint.


Wednesday, December 14, 2011

My awkward family photo!

I love to look at Awkwardfamilyphotos.com for a good laugh, little did I  know I had a good laugh in my own scrapbooks, look what I just found!


Aren't these the cutest kids ever, this was almost 20 years ago.  Sears offered the first 5 photos for a great price, anything after that was expensive.  Expensive was out of the question because we were students, no digital photography back then either, you paid then you went back in a few weeks to pick up your portraits.  

Ba, ha, ha, ha!  Devon forgot how to smile, Kirby had a piece of gum to keep him quiet and Macy, well Macy is still as pleasant as the photo shows.  I wouldn't trade these kids 
or this photo for a million dollars!
Memories! 

I've been very busy...

...so busy in fact, I couldn't get around to updating my blog!  

Actually, I've been spending a lot of time playing Words With Friends, enjoying birthdays, being a waterpolo mom and getting ready for my Christmas guests.


I did although find the time to finally paint my pantry door, isn't it cute, oh, I also painted my kitchen (it was red and I'm so glad to see that gone!)

I  sat here for my birthday dinner, the BIG 50! Thank you Macy is was outstanding!  


 And enjoyed the company of these friends!

Then, we celebrated Delaney's 15th birthday with some of these, mmmmm!

 
And finally Water Polo, I've been spending lots of time watching this game, it's kind of like soccer in the water I've told myself, except your feet are treading water the whole time and your hands are waving around in the air trying to catch the ball.  Whew, I'm out of breath just talking about it, Delaney you're an awesome player.


I've also been making lots of Christmas treats, I'll show you those later.  


Friday, November 11, 2011

More fun mail

I love sending thank-you's or hello's or whatever I can think of, especially if I can send it 
on something unusual.  
Today I had a thank-you note to send...this one on an old Wham record from the second hand store for $1.50!  I printed out my message on vinyl with my silhouette and stuck it on one side, then put the mailing address on the other side.  No packaging required!


Remember to mail it at the Post Office ($1.50), not a pack and ship place (lots of dollars)!

Tuesday, November 8, 2011

Cupcakes in a jar

Doesn't that sound yummy, cupcakes in a jar!!  
When I mentioned it to friends they couldn't wrap their heads around a cupcake in a jar,
 its quite simple really.  Small canning jars work best, I think mine were the 8 oz. size. 
 Bake your cupcakes as usual, let them cool then cut them in half, put the bottom half in the bottom of the jar, pipe on some frosting then set the remaining cupcake on top of the frosting, pipe on more frosting,
 and viola!  A cupcake in a jar!
The only problem was everyone wanted to take their cupcake home and I wanted to keep the jars for making jam, they were really quite pretty to look at so return my jars anyway I don't blame them. 

  
I tied a plastic spoon to the jar with some bakers twine, a neat little package!

Check out Kiki Creates (one of my new favorite blogs) her recent posting is all about photography lighting, too bad I didn't read the blog before I tried to take a picture of my cupcakes in a dark kitchen with a flash!

Friday, November 4, 2011

A pretty rose

I have a backyard full of lovely roses that make me very happy to look at. 
When my sister came for a visit in August she snipped one and put it in this cute little dish. 
I just found the dish again and straight away went outside to snip another rose.
Its scent is heavenly, and no matter what, whenever I walk past it I have to bend down and smell it.


It's funny how a little thing can make someone so happy!

Tuesday, November 1, 2011

Which tape holder to use...hmmm

I came up with a couple of tape holder ideas.  I went to my favorite second hand store and tried to think outside the box, but the box was really confining for some reason.  I did although find a great ornate mirror with my name all over it and when I asked the salesman if he "really wanted me to pay $4.99 for it"  he replied "yes, plus tax!"  Whatever!!!

Oh yea, I was talking about tape holders for my extensive washi tape collection.

 
 This sugar container works great.

 
This dowel and 3 1/2" finished wood works too.


So I kept them both!
  

Potato soup

Doesn't  a warm bowl of soup on a chilly Halloween Eve sound delicious!  It was!


I wanted to serve it in a pumpkin, but I was the only one who appreciated liked 
the pumpkin bowl.  It was truly delicious though, I promise!  
Then we had candy for desert, oh, and a wonderful cupcake from friend Brittanie!


Monday, October 31, 2011

Washi tape

I've found a new love, washi tape!  
So I've actually been in love for some time now but it's been recently rekindled because 
of the need to find a worthy spot to put my collection.  
Uhmmmm...my collection consists of exactly 12 glorious rolls of the stuff, 
not a worthy blog photo, but check out this collection from Studio Calico!


Now I am on a quest for a holder for my tape, hhhmmmm, what will work!  
Check back later to see what I came up with.

Best Halloween costume ever!

My college student son and his wife sent me a picture of their Halloween costumes, it took me a minute then I realized who they were...the house and balloons were a dead giveaway.  
They're Mr. Fredricksen and Russell from the movie Up!


You guys win for best costume!  
And, it's my favorite laugh, cry movie... squirrel!!!

Sunday, October 30, 2011

An awesome Halloween entryway

I found this entryway easy on the Halloween eyes, Jenny at Blue Sky Confections pulled it off perfectly!


Friday, October 28, 2011

Paper cup light swag

I've been waiting to find a string of christmas lights with white wire instead of green.
They were nowhere to be found during the summer but I did find some in black
which would be perfect for my halloween idea.

These cuties turned out just as planned and I see an endless possibility for them!


To make them I used:
3 oz disposable dixie cups
glue stick
paper of choice
scissors and pen
cardboard for template
set of string lights 


1. Gently take apart a cup, it's not difficult.


2. Use the open cup to make a template out of cardboard then trace your shape onto your patterned paper.                                  


3. Use a glue stick to attach the paper to the cup. 


4. Make a small hole in the bottom of the cup to push the lightbulb through.  You'll see the light inside the cup, now you've got a tiny lampshade for your bulb.  Carry on with each bulb till you're done!


Viola!

Wednesday, October 19, 2011

Glow in the dark volleyball

Last night for our youth activity we played glow in the dark volleyball.  I have to tell you I spent more than a few sleepless nights trying to figure out how to make a ball glow in the dark.  First I bought some expensive black lights hoping that would do the trick, nope, the glow didn't extend far enough to light up the ball.  Hmmmm...then someone suggested putting glow sticks inside a blow up beach ball, that was a great idea except where would I find a beach ball in October!  I looked, believe me.  Then it came to me, I would try injecting some of the "glow" liquid into a ball, it worked and here's how you can do it too.

You'll need:
-Paper towels
-scissors
-disposable cup
-2-3 glow sticks (I used the bigger Slim Stick because it held more liquid)
-syringe with heavy gauge needle (vet tac supply store)
-kids ball  


 Break the glow stick a few times to activate it, shake, shake, shake.

 Tap the end of the glow stick on the counter to get the liquid away from the top, cut the tube above the liquid (so it doesn't squirt on you).  Empty it into your disposable cup by tapping it on the side until it's all out.  There are two separate liquids inside the plastic tube, when you bend the tube you are breaking the glass to allow the two to mix.  
 Use your syringe to draw up the liquid. (See the broken glass a the bottom, just leave it there)
 There it is, cool huh!
 Find the nipple of the ball.
 Inject the liquid directly into the tiny hole in the nipple.  Squirt!  (when it's time, dispose of your syringe and needle properly) Wipe off the area if you need to. 
Now bounce it around a few times to help coat the inside of the ball.

This is where I show you how it looks...I couldn't take a picture of the ball glowing! 
 Believe me though, it glows, just take it into a dark room to see.


We hung the glow bracelets all along the top edge of the volleyball net and gave all the players one for each wrist.  The effect of the bracelets hanging off the net and the glowing ball was fabulous!

*Prepare the ball just before you play, so the glow lasts longer, you'll want to have supplies to re glow the ball during the game.  Ours lasted less than an hour but it was easy to prepare another ball for play.

We had a lot of fun, the kids were excited and that's what's it's all about!

Now a word about the safety of glow bracelets.  They aren't poisonous but they are an irritant so don't lick the glow liquid off your hands, instead you should wash your hands after you prepare the ball.  Sorry, I had to do that, it's like the warning on a blow dryer not to use it while you're in the bathtub!!